
← All WonderLister user guides
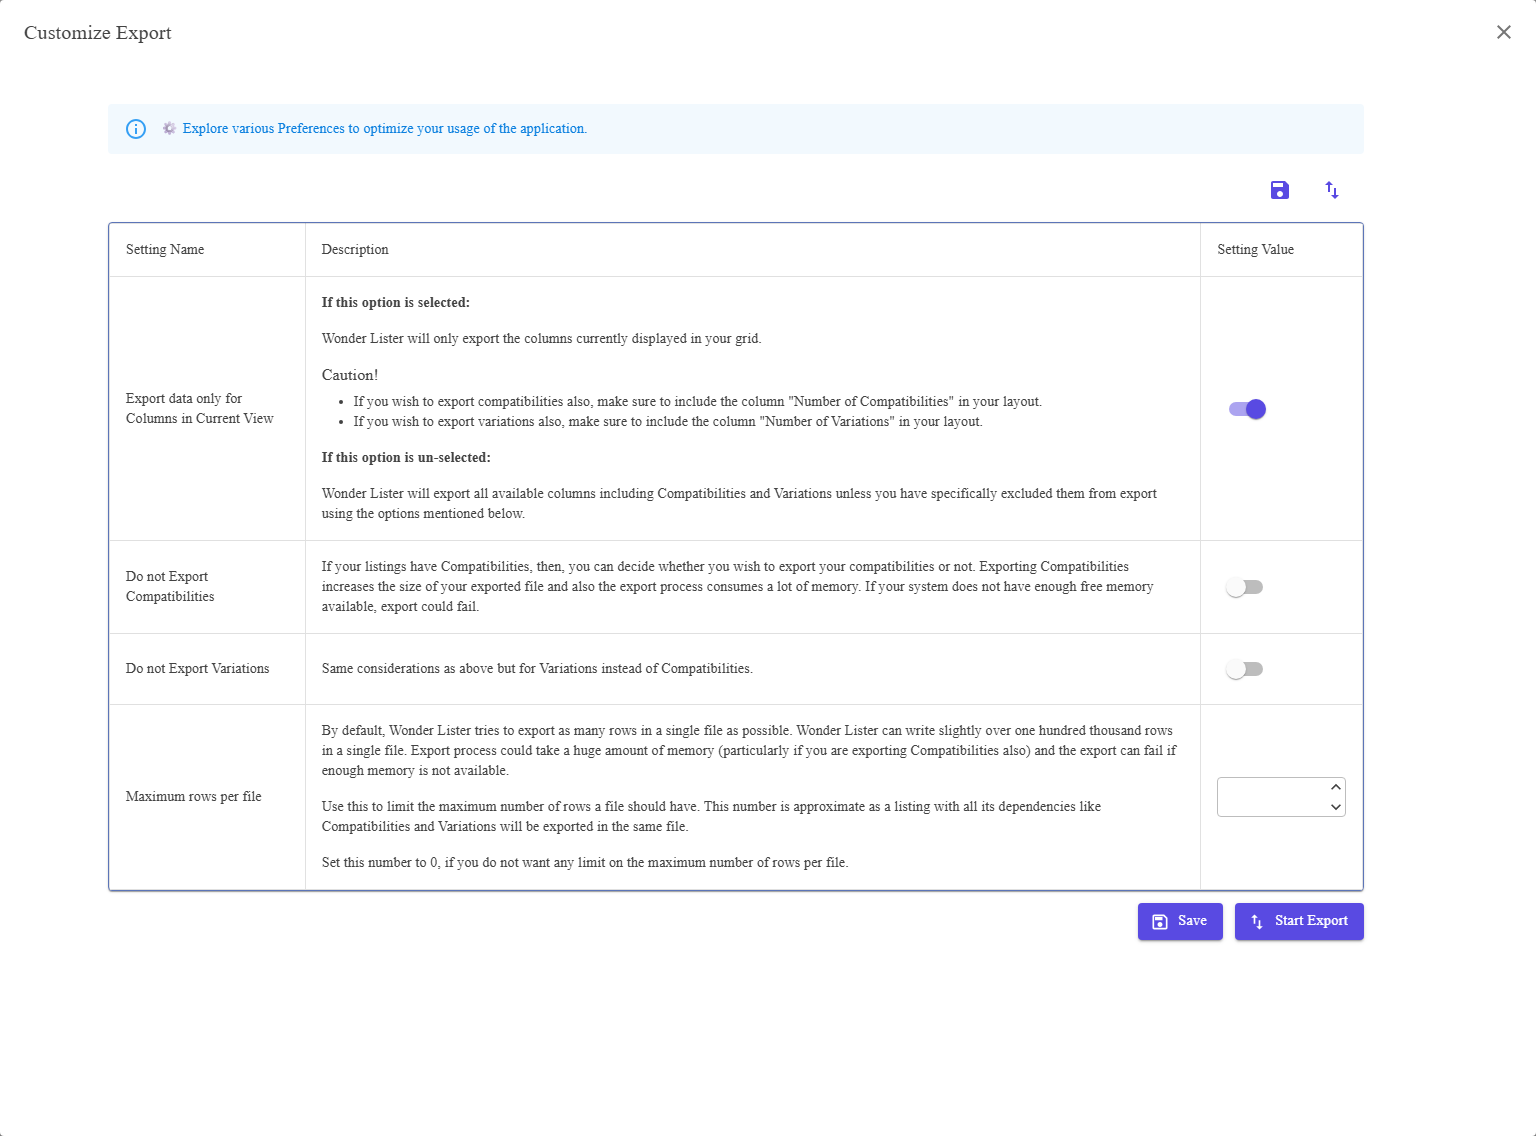
The dialog that starts an export — and lets you settle how it should behave first, without leaving for the
settings pages and losing your selection.
Where to find it
Select the rows on Listings or
Listing Templates, then Export to CSV from the toolbar.
What is in it
The same four settings as the Export to CSV section of
Preferences — which columns to write, whether compatibilities and variations
go with them, and how many rows per file. They are the same settings on the same account, shown here so you
can check them at the moment they matter.
The buttons
| Button | What it does |
|---|---|
| Save | Stores the settings, without exporting. They will be used next time too. |
| Start Export | Runs the export on your selection. |
Both appear twice — as icons at the top right and as buttons at the foot. They do the same thing.
export writes only what your layout holds — and compatibilities and
variations then need the Number of Compatibilities and Number of Variations columns to be in
that layout, or they are quietly left out.
How to use it
- Select what you want to export — a folder or a search is the usual way.
- Open Export to CSV from the toolbar.
- Check the settings.
- Press Start Export. It runs in the background; watch it in
Activity Logs.
FAQ
Exclude them, set a row limit, and export a smaller selection —
Export to CSV has the full list of things to try.
Activity Logs records it, and the file names appear there.
first — a file with no compatibility or variation rows can delete them from your listings.
Support
For further assistance you can:
- Email [email protected]
- Use the Contact Us page inside the application
← Back to the User Guide index
Or go to Support, the FAQs, or contact us.